
Waste not, want not
I call this my ‘waste not, want not’ technique, but technically it isn’t really a ‘technique’ as much as a process and/or a way of thinking. It goes hand-in-hand with my ‘ecofriendly artist’ handle. Thinking creatively about the tools and resources I have available to me. What can I reuse/recycle? The ‘starving artist’ in me has a lot to do with it, too. I can’t always afford new canvases, tools and other resources, so I need to think about how I can use what I already have. Why keep (or worse, throw out) a painting that isn’t very good, when I can easily paint or gesso over it and have a ‘new’ canvas? Why put paint on a brush that eventually will need to be cleaned and the brushwater disposed of, when I can use my fingers or something that I was going to throw away anyway, like an expired credit card?
I’m not suggesting that I never use brushes. I do, of course. However, when I do use a brush, I treat the brushwater before disposing it. (More on this in a future blog.) In addition, when I know I’ll be using the same color again soon, I keep my brushes with paint in them in sealed plastic bags. This keeps more paint out of the brushwater and keeps the paint from drying on (and ruining) the brush.
Moving on … Step 3 of Painting #1
At this point I’m covering the two paintings created previously in Step 1 and Step 2 in separate posts.
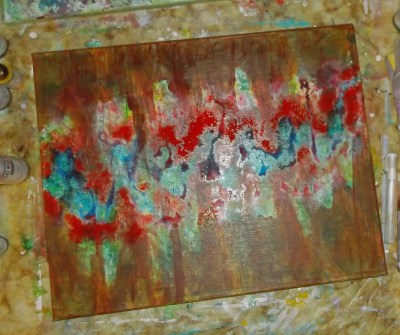
Here’s #1, after Step 2 and my starting point today.
I look at this and my first thought is, “that’s pretty ugly.” Which is OK. There is almost always an “ugly” stage in abstract painting. Ugly can be transformed by adding more layers. Worst case scenario, it can be gessoed over to begin again. Which I almost did.
Instead, I decided to cover it with Hansa Yellow Light with a little white to make it a bit more opaque. Then I took a plastic comb and scratched into it while still wet. This allows some of that ‘ugly’ layer to filter through and creates a nice base and composition for the next layer.

At first, I was thinking a rainbow. Then I considered doing something monochromatic. Both seemed too easy and I’m looking to experiment and learn from this experience. After giving it some thought, I decided I wanted to add some texture and put a twist on the composition. So, I took some heavy gloss gel and the same comb I used in step #3 and added lines crossing the lines laid down previously.

The gel appears white in the photo, but it dries clear and will leave a 3-D effect on the canvas. More to come in the my next blog.
Go to Step #4.
You must be logged in to post a comment.